After about five years of almost daily use a number of the panel and meter lamps on my MA6900 had burned out. The closest Mac authorized service center is about 400 miles away from where I live, and I was reluctant to incur the cost and risks of shipping a 80 pound piece of gear both ways. Moreover, it had become apparent to me that replacing the lamps at periodic intervals would be a recurring bit of maintenance. So, why not try it myself?
I posed a question on Audiokarma asking for help or guidance, but didn't get much response. So I popped the lid and muddled through myself. This simple page is intended as a primer based on my experience.
Okay, if you're still with me ...
1. I shouldn't have to say this, but UNPLUG THE AMP before doing anything! Duh.
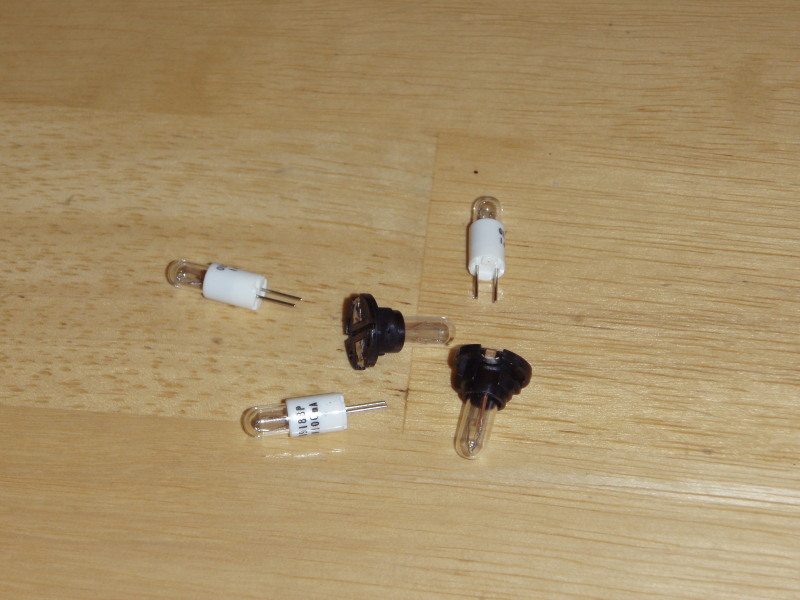
2. Get yourself some replacement bulbs. I mail-ordered mine from Audio Classics and they cost me three bucks a piece. The panel bulbs are a bayonette screw-in type (the black ones) and the meters take bulbs that need to be soldered in (the white ones). Get a full set (6 meter bulbs, 8 panel bulbs), even if only one or two need to be replaced. Based on my personal experience and the comments from others, if the bulbs in your amp are more than a few years old you're probably going to kill some good bulbs with the vibrations you'll create poking around. When I began I had a couple dead panel lamps and one meter lamp. I managed to kill three more. If you're going to go through the trouble of doing this I'd suggest replacing all the bulbs while you're in there, even if they're not all dead.
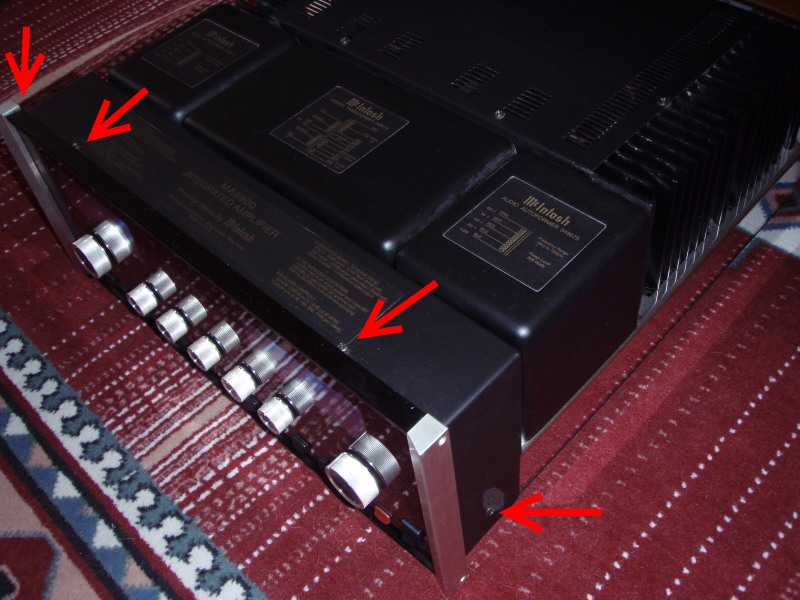
3. Remove the four screws on the front panel cover, which is located in front of the transformers ...
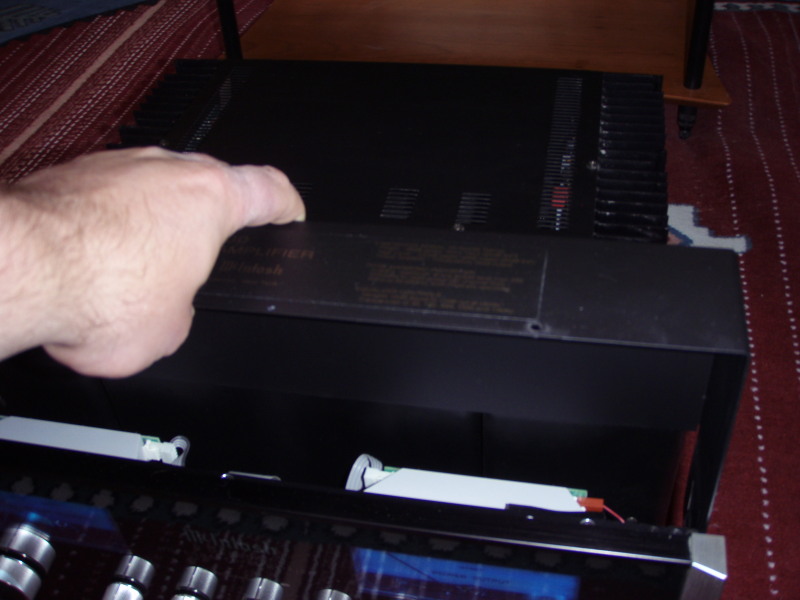
... and lift the cover straight up and off.
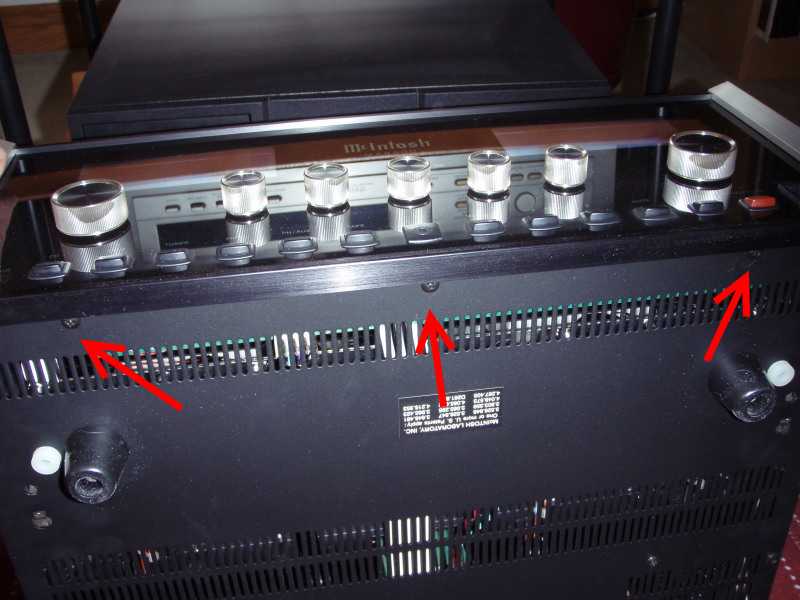
4. Next, remove the three screws on the bottom at the front of the amp.
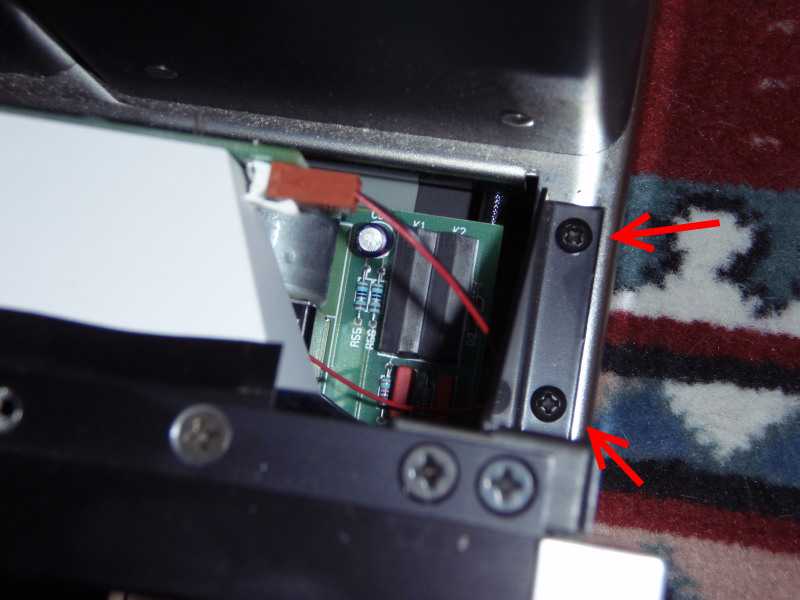
5. Remove the four inside screws (two on either side) which secure the panel to the rest of the chassis. NOTE: Be careful as you take out the last couple of screws because the panel will want to tip forward once it's unsecured and all that will hold it in place are wires and cabling -- you don't want to unduly stress these wires.
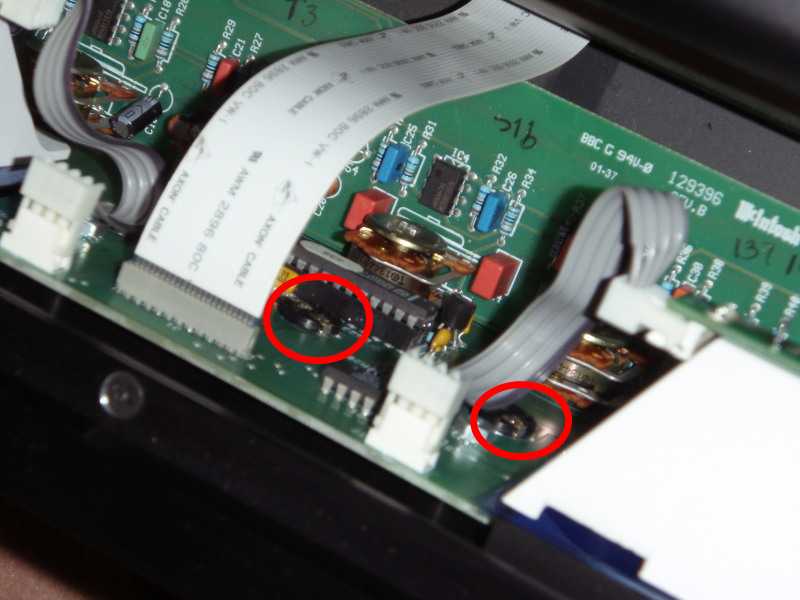
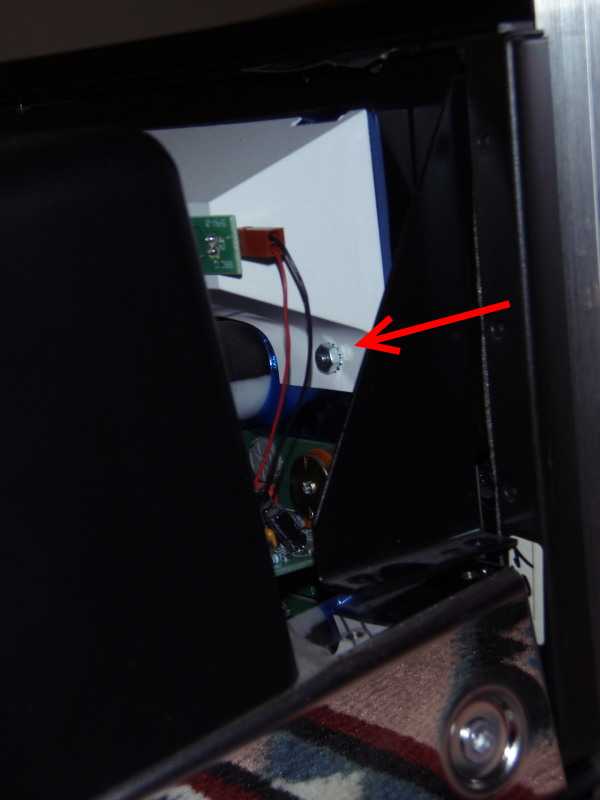
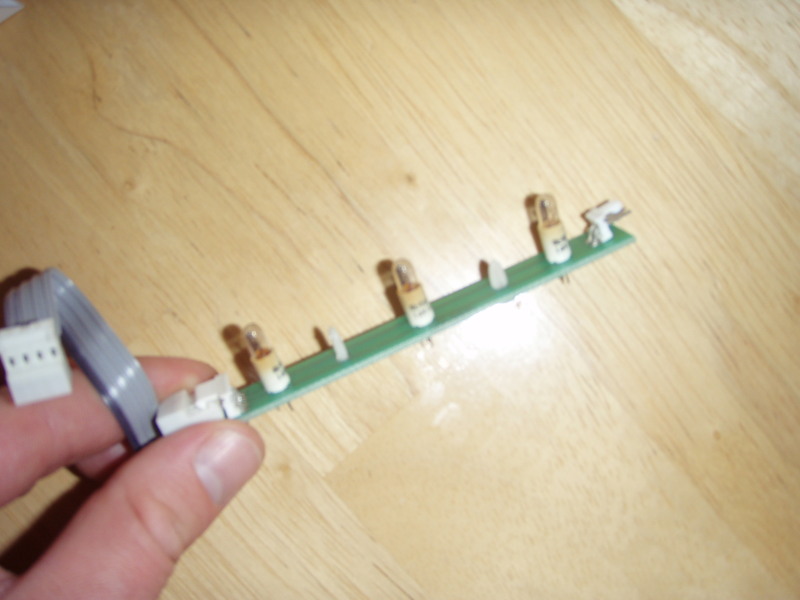
6. Now that you're inside you'll be able to access the panel bulbs. I've circled two of them below in red. The rest will be pretty easy to identify once you're in there yourself. In order to easily access the bulbs at the bottom you will also need to unplug at least one set of wires allowing the panel to fall further away from the transformers (see the second picture in step 7 below -- I've circled this set of wires); just push down on them to disconnect but be warned that if you have fat fingers there's not a lot of room to work in when trying to plug them back in. I did not disconnect the white wide ribbon cable you see in the middle of this picture.
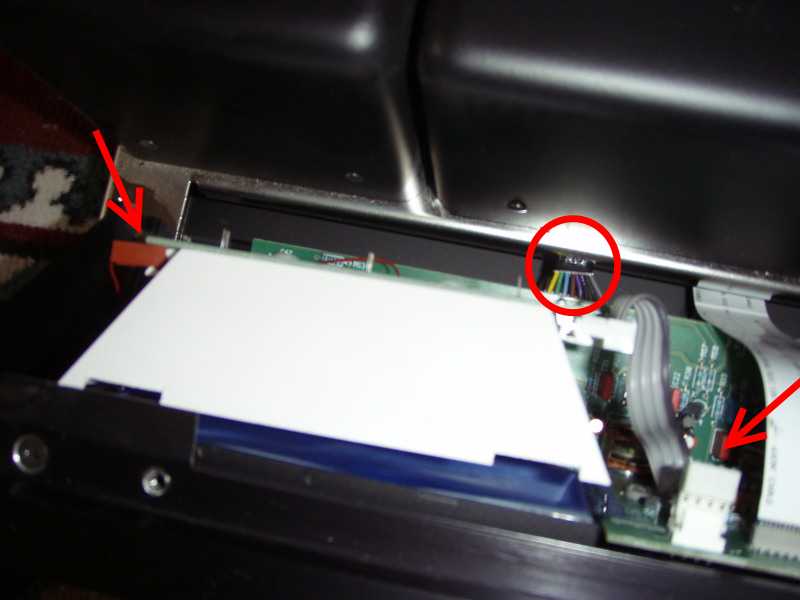
7. In order to change the meter bulbs you will need to remove the meter reflector hoods from the amp. They are each held in place by two small nuts (only one is visble in this picture). There's not a lot of room to get a wrench in there, but they come off easily if you just put a 1/4 inch socket on them and twirl it with your fingers (not using a ratchet). The nuts in my amp were only slightly tighter than finger-tight.
You'll need to unclip the wires/cable (arrows) from either side of the hood.
Again, the plug on the cable at the bottom (circled) will need to be disconnected back in step 6 to allow the panel to be pulled away from the transformers so that you have room to access the nuts and panel bulbs.
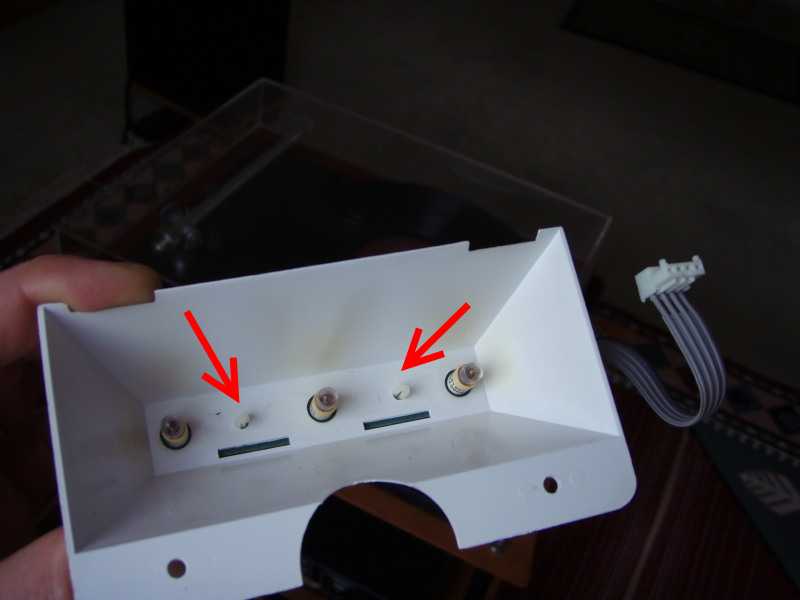
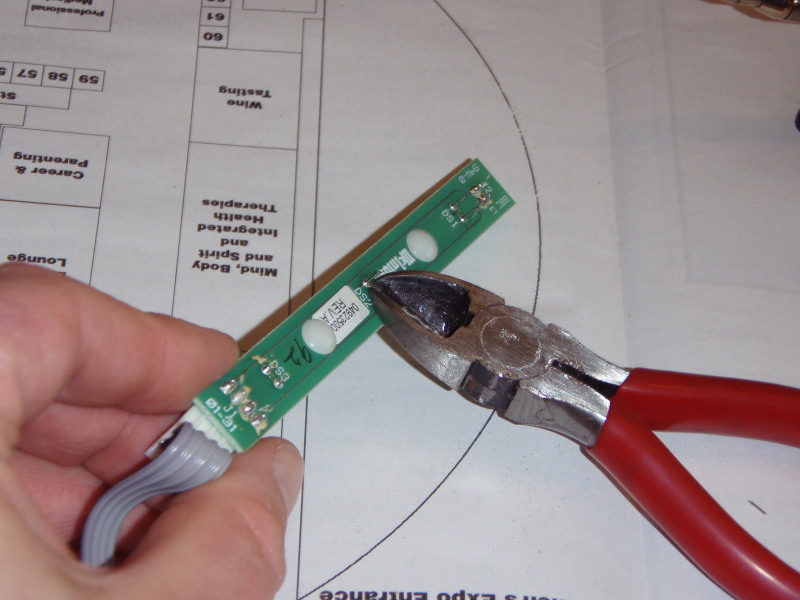
8. Once you've removed the hood, pinch the plastic clips to allow the PC board to be diconnected from the hood.
Voila! The PC board with the old bulbs in it.
9. Clip off the tails of the bulbs to make removal easier ...
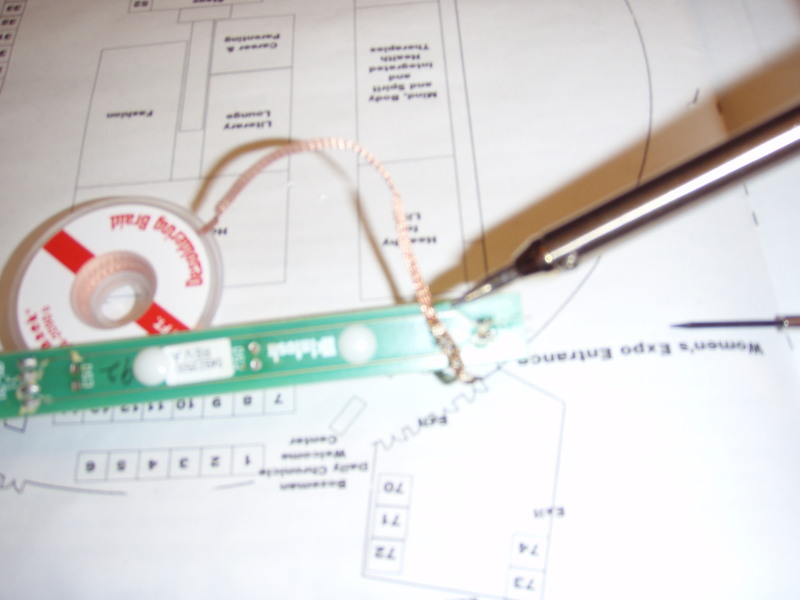
... and desolder the old bulbs. I used desoldering braid and a low-heat (15W) iron to remove ALL the old solder. Then the new bulbs easily pop into the clean holes.
Sorry, I didn't take any pictures of soldering the new bulbs in, but that should be pretty straightforward.
10. Finally, reassembly is the reverse of the above steps.
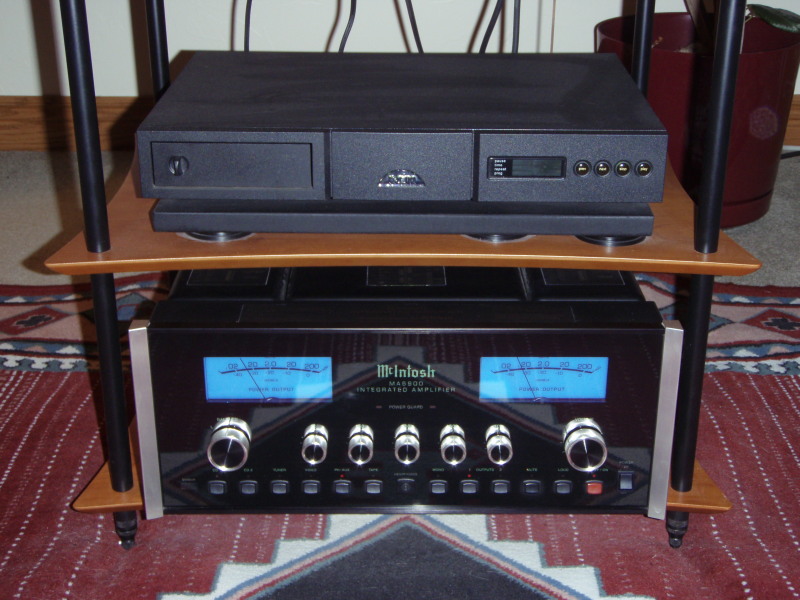
If all goes well your MA6900 should have a new sexy look to it! And, I promise you, you'll swear that it even sounds better!!
11/02/07